> ## Documentation Index
> Fetch the complete documentation index at: https://docs.gocromo.com/llms.txt
> Use this file to discover all available pages before exploring further.
# Invite and manage members
> Invite colleagues, assign Workspace roles, control Project access, and remove members safely.
Use this guide to invite a new colleague, give them the right role, control which Projects they can open, and remove access safely.
## How access works
Cromo uses two access boundaries:
| Boundary | What it controls | Where you manage it |
| ------------------------ | ------------------------------------------------------------------ | -------------------------------- |
| **Workspace membership** | Whether a person belongs to the Workspace and which role they have | **Workspace settings → Members** |
| **Project membership** | Which Project content that person can open | **Project settings → Members** |
A person needs both Workspace membership and Project membership to open a Project. Their Workspace role determines what they can do after they enter it.
Inviting a new person adds them to the Workspace and to one initial Project. Add them to any other Projects separately.
## Before you begin
You need the **Admin** or **Owner** role. The Workspace must contain at least one Project because every invitation includes an initial Project.
Choose the role before sending the invitation:
* **Viewer** for people who need to ask questions and read shared content.
* **Member** for everyday contributors who add Sources, review Knowledge, work with Data, and build automations.
* **Admin** for people who also manage members, settings, and connectors.
* **Owner** is not available in the invitation form. Ownership is reserved for existing Workspace owners.
See [Roles and permissions](/reference/roles-and-permissions) for the complete capability matrix.
## Invite someone to the Workspace
### 1. Open Workspace settings
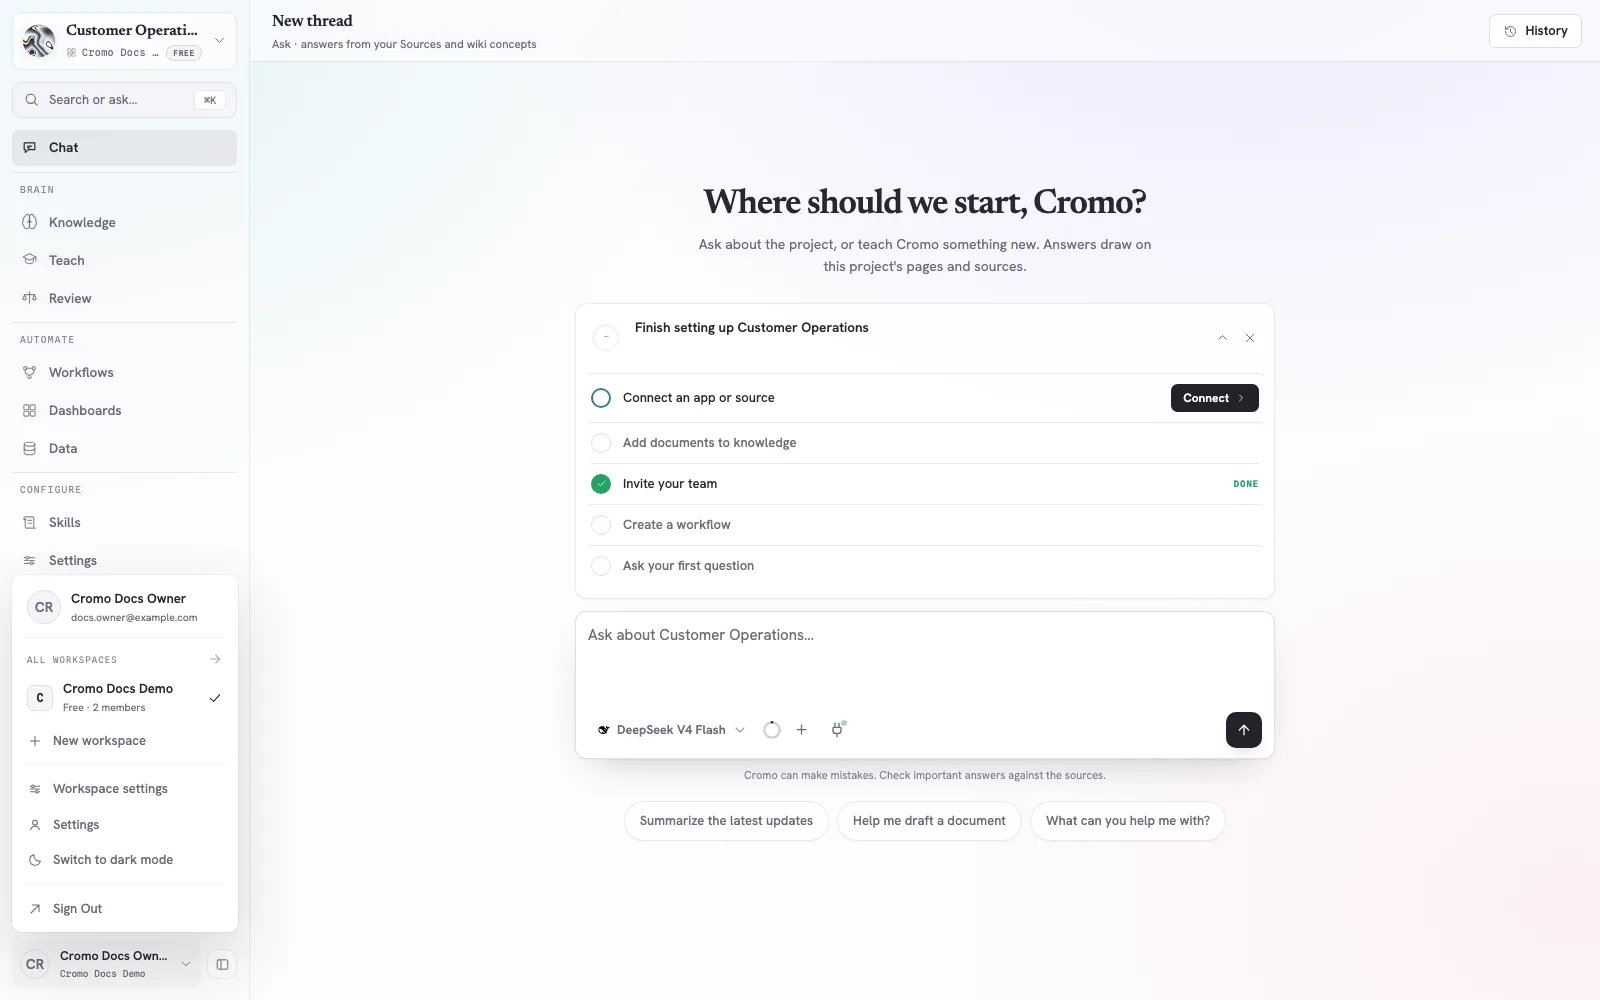
1. In the lower-left corner of the sidebar, select your name.
2. Confirm that the correct Workspace has a checkmark.
3. Select **Workspace settings**.
4. In the settings sidebar, select **Members**.
 ### 2. Review current members
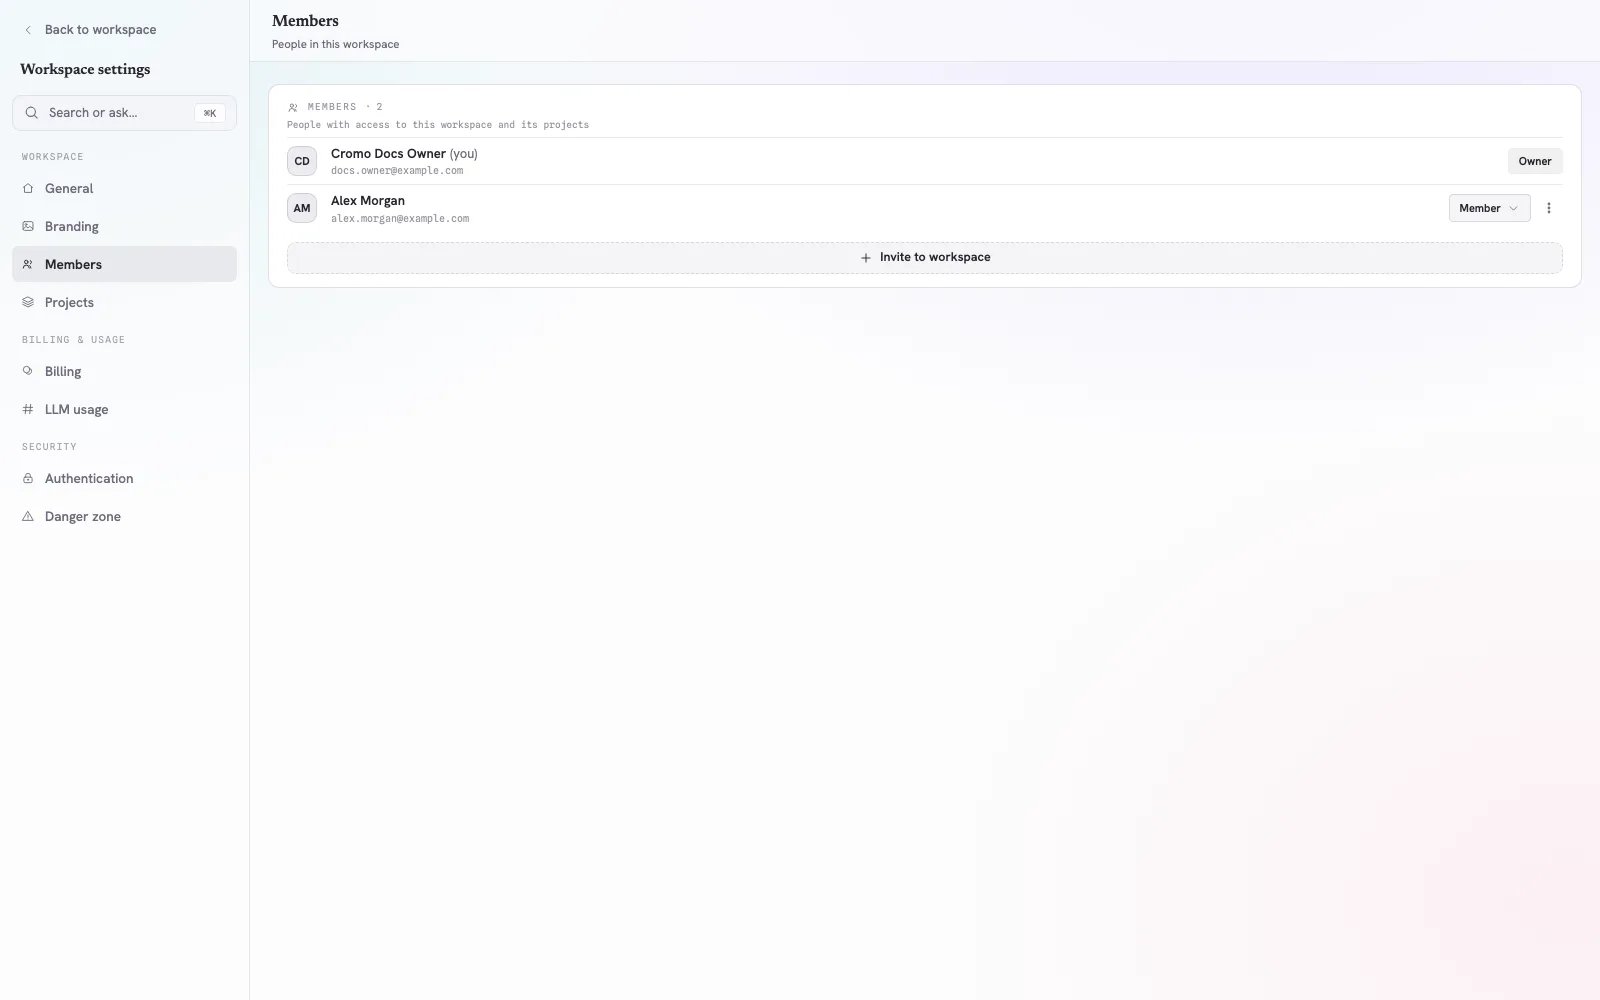
The Members page shows each person's name, email, and Workspace role. It also shows pending invitations below the active members.
### 2. Review current members
The Members page shows each person's name, email, and Workspace role. It also shows pending invitations below the active members.
 ### 3. Send the invitation
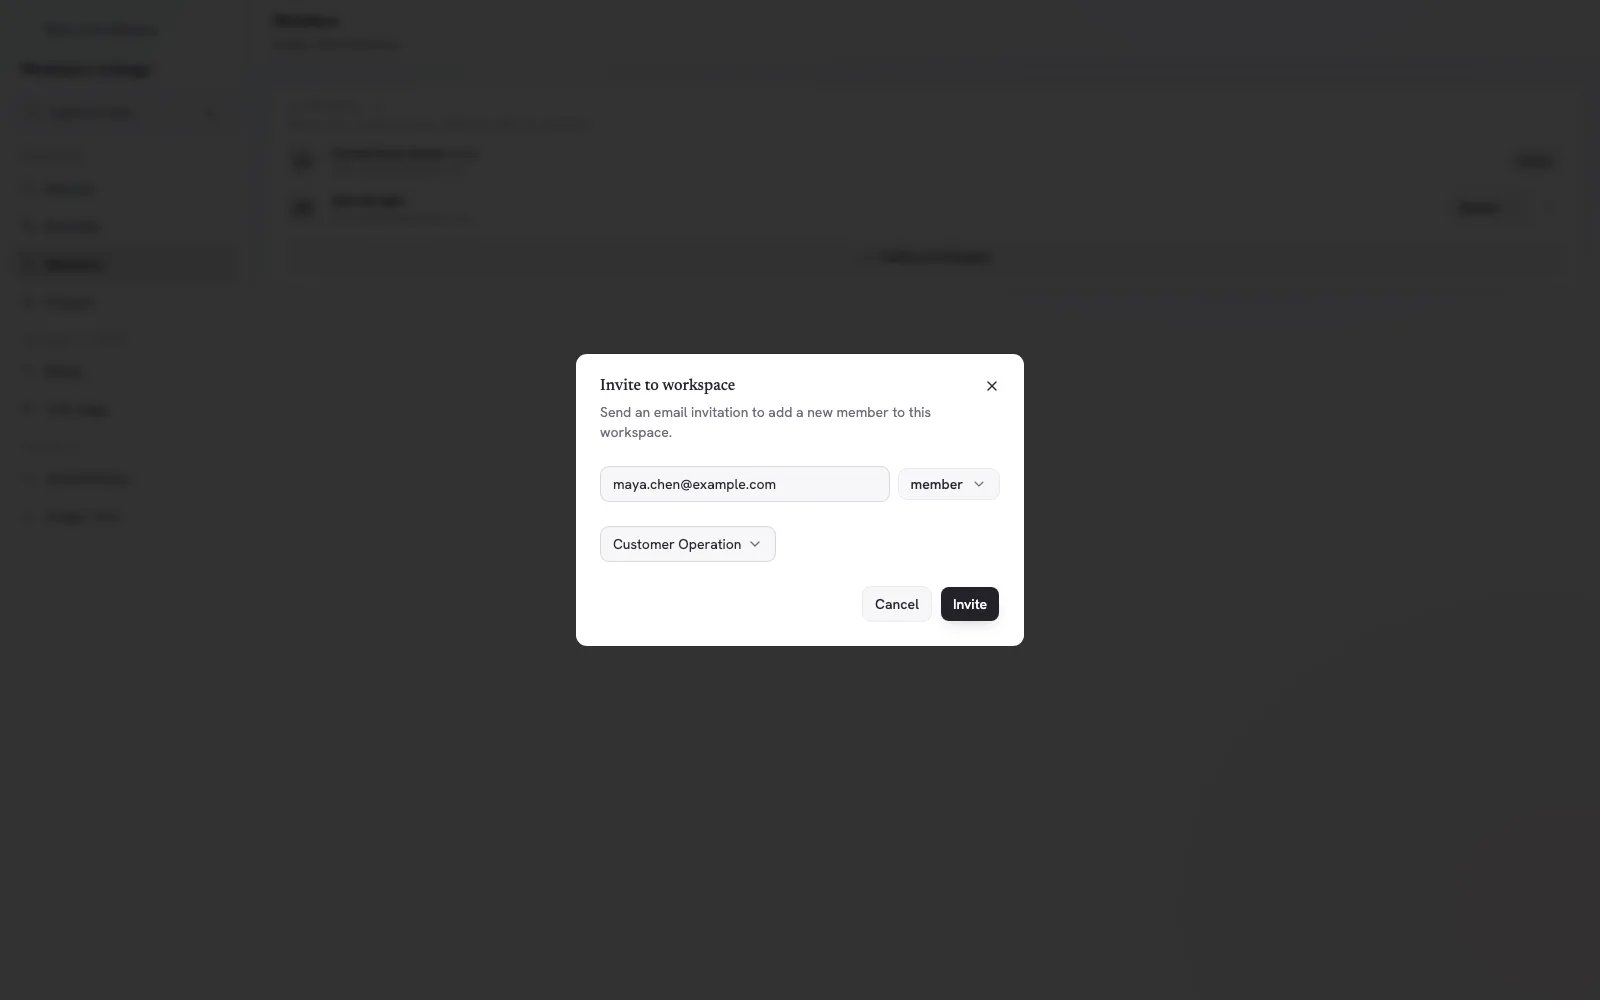
1. Select **Invite to workspace**.
2. Enter the colleague's email address.
3. Choose **Viewer**, **Member**, or **Admin**.
4. Choose the first Project they should access.
5. Select **Invite**.
### 3. Send the invitation
1. Select **Invite to workspace**.
2. Enter the colleague's email address.
3. Choose **Viewer**, **Member**, or **Admin**.
4. Choose the first Project they should access.
5. Select **Invite**.
 The invitation appears as **Pending** until the recipient accepts it. To withdraw it before acceptance, select **Cancel** on the pending invitation.
Start with the lowest role that supports the person's work. You can change Viewer, Member, and Admin roles later without sending a new invitation.
## Add an existing Workspace member to another Project
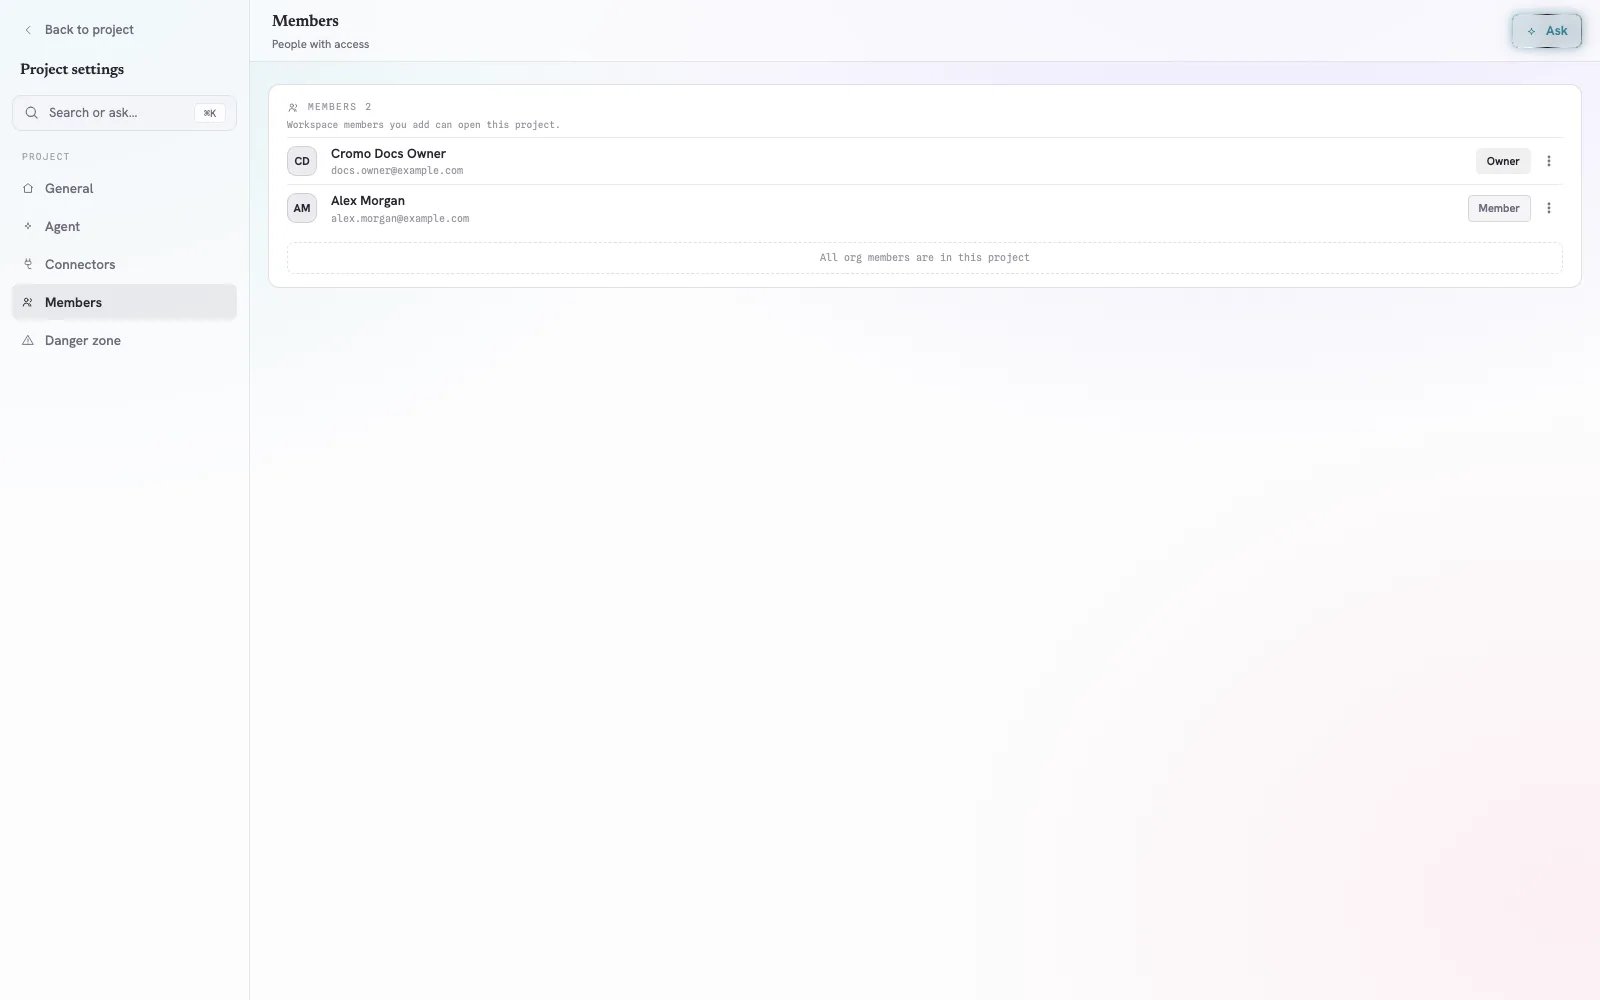
1. Open the Project.
2. Select **Settings** in the Project sidebar.
3. Select **Members** under **Project**.
4. Select **Invite member**.
5. Choose a Workspace member from the list.
The person can open the Project immediately. Their role badge reflects their Workspace role; Project membership does not create a second role.
The invitation appears as **Pending** until the recipient accepts it. To withdraw it before acceptance, select **Cancel** on the pending invitation.
Start with the lowest role that supports the person's work. You can change Viewer, Member, and Admin roles later without sending a new invitation.
## Add an existing Workspace member to another Project
1. Open the Project.
2. Select **Settings** in the Project sidebar.
3. Select **Members** under **Project**.
4. Select **Invite member**.
5. Choose a Workspace member from the list.
The person can open the Project immediately. Their role badge reflects their Workspace role; Project membership does not create a second role.
 If the person does not appear in the list, invite them to the Workspace first.
## Change a Workspace role
1. Open **Workspace settings → Members**.
2. Select the role next to the member.
3. Choose **Viewer**, **Member**, or **Admin**.
The new permissions apply across every Project the person belongs to. Changing a role does not add the person to other Projects.
### Example
Maya joins the **Customer Operations** Project to monitor escalations:
1. Invite Maya as **Viewer** and choose **Customer Operations**.
2. After Maya starts maintaining Sources, change her role to **Member**.
3. If Maya later needs access to **Sales Enablement**, add her from that Project's Members page.
No second Workspace invitation is needed.
## Remove access
Choose the scope that matches your intent:
| Goal | Action | Result |
| ---------------------------- | --------------------------------------------------------------- | -------------------------------------------------------------------------- |
| Remove access to one Project | Project settings → Members → menu → **Remove from project** | The person stays in the Workspace and keeps access to their other Projects |
| Remove access everywhere | Workspace settings → Members → menu → **Remove from workspace** | The person loses access to every Project immediately |
| Stop an invitation | Workspace settings → Members → **Cancel** | The pending invitation can no longer be accepted |
Cromo asks for confirmation before removing an active member. The last Workspace Owner cannot be removed.
Before removing someone who owns recurring work, reassign their responsibilities and review any Skills, Workflows, connectors, or approvals that depend on them.
## Troubleshooting
### I cannot see member controls
Only Admins and Owners can manage Workspace and Project membership. Ask a Workspace Admin or Owner to make the change.
### The colleague is in the Workspace but cannot open a Project
Add them from **Project settings → Members**. Workspace membership alone does not grant access to every Project.
### The colleague has access but cannot edit
Check their Workspace role. A Viewer can read Project content and use chat but cannot change shared operational assets.
### The invitation cannot be sent
Confirm that:
* the email address is valid;
* an initial Project is selected;
* the Workspace has an available member seat;
* no invitation for the same person is already pending.
## Access review checklist
* [ ] Every active member still needs Workspace access.
* [ ] Each member belongs only to the Projects required for their work.
* [ ] Viewers do not need edit permissions.
* [ ] Admins are responsible for access or configuration.
* [ ] At least one active Owner remains.
* [ ] Ownership of recurring work is reassigned before removal.
If the person does not appear in the list, invite them to the Workspace first.
## Change a Workspace role
1. Open **Workspace settings → Members**.
2. Select the role next to the member.
3. Choose **Viewer**, **Member**, or **Admin**.
The new permissions apply across every Project the person belongs to. Changing a role does not add the person to other Projects.
### Example
Maya joins the **Customer Operations** Project to monitor escalations:
1. Invite Maya as **Viewer** and choose **Customer Operations**.
2. After Maya starts maintaining Sources, change her role to **Member**.
3. If Maya later needs access to **Sales Enablement**, add her from that Project's Members page.
No second Workspace invitation is needed.
## Remove access
Choose the scope that matches your intent:
| Goal | Action | Result |
| ---------------------------- | --------------------------------------------------------------- | -------------------------------------------------------------------------- |
| Remove access to one Project | Project settings → Members → menu → **Remove from project** | The person stays in the Workspace and keeps access to their other Projects |
| Remove access everywhere | Workspace settings → Members → menu → **Remove from workspace** | The person loses access to every Project immediately |
| Stop an invitation | Workspace settings → Members → **Cancel** | The pending invitation can no longer be accepted |
Cromo asks for confirmation before removing an active member. The last Workspace Owner cannot be removed.
Before removing someone who owns recurring work, reassign their responsibilities and review any Skills, Workflows, connectors, or approvals that depend on them.
## Troubleshooting
### I cannot see member controls
Only Admins and Owners can manage Workspace and Project membership. Ask a Workspace Admin or Owner to make the change.
### The colleague is in the Workspace but cannot open a Project
Add them from **Project settings → Members**. Workspace membership alone does not grant access to every Project.
### The colleague has access but cannot edit
Check their Workspace role. A Viewer can read Project content and use chat but cannot change shared operational assets.
### The invitation cannot be sent
Confirm that:
* the email address is valid;
* an initial Project is selected;
* the Workspace has an available member seat;
* no invitation for the same person is already pending.
## Access review checklist
* [ ] Every active member still needs Workspace access.
* [ ] Each member belongs only to the Projects required for their work.
* [ ] Viewers do not need edit permissions.
* [ ] Admins are responsible for access or configuration.
* [ ] At least one active Owner remains.
* [ ] Ownership of recurring work is reassigned before removal.